Deep Dropping
The SPJ Approach
In this article, I will share my experiences with slow-pitch jigging in deep waters, typically ranging from 150m to 300m (500-1000ft) depths. While it might appear straightforward to simply use a heavier jig, successful fishing involves a more nuanced approach to achieve optimal effectiveness. This includes selecting the appropriate reel, line, rod, jig, and techniques, jigging with an electric reel, understanding fishing conditions, and refining techniques for optimal results.
Disclaimer – This article is based on my personal experiences. Different strokes for different folks apply here; you may find other methods that suit you better, so consider this as just one perspective and take it with a grain of salt.
Reel
Whether it’s a star or lever drag reel or a reel with 15kg drag output will not be discussed; it depends on one’s preference. I want to share 3 aspects I will consider when choosing a reel for deep jigging. They are the line capacity, gear ratio, and length of the handle arm.
Gear Ratio & Handle Arm
Retrieving a 600g jig from 250m can be incredibly taxing, requiring approximately 270 rotations of the handle with a stock OJ2000 and averaging about 8 minutes of physical effort. Bringing in large fish from such depths is similarly exhausting. A proper combination of correct gear ratio and handle arm length can alleviate these challenges. It will also reduce fatigue and enable one to jig for extended periods.
The typical gear ratio of jigging reels is around 6:1. For deep jigging; I prefer a lower ratio to maximize winching power. The speed of line retrieval, or the amount of line recovered with each handle turn, isn’t necessarily critical. Instead, the increased torque provided by a lower gear ratio is beneficial when retrieving a jig or battling a fish. For deep jigging, winching in your fish rather than using the pump-and-wind is a better method. I will delve deeper into this topic later in the article. For optimal performance, a gear ratio of approximately 5:1 is ideal.
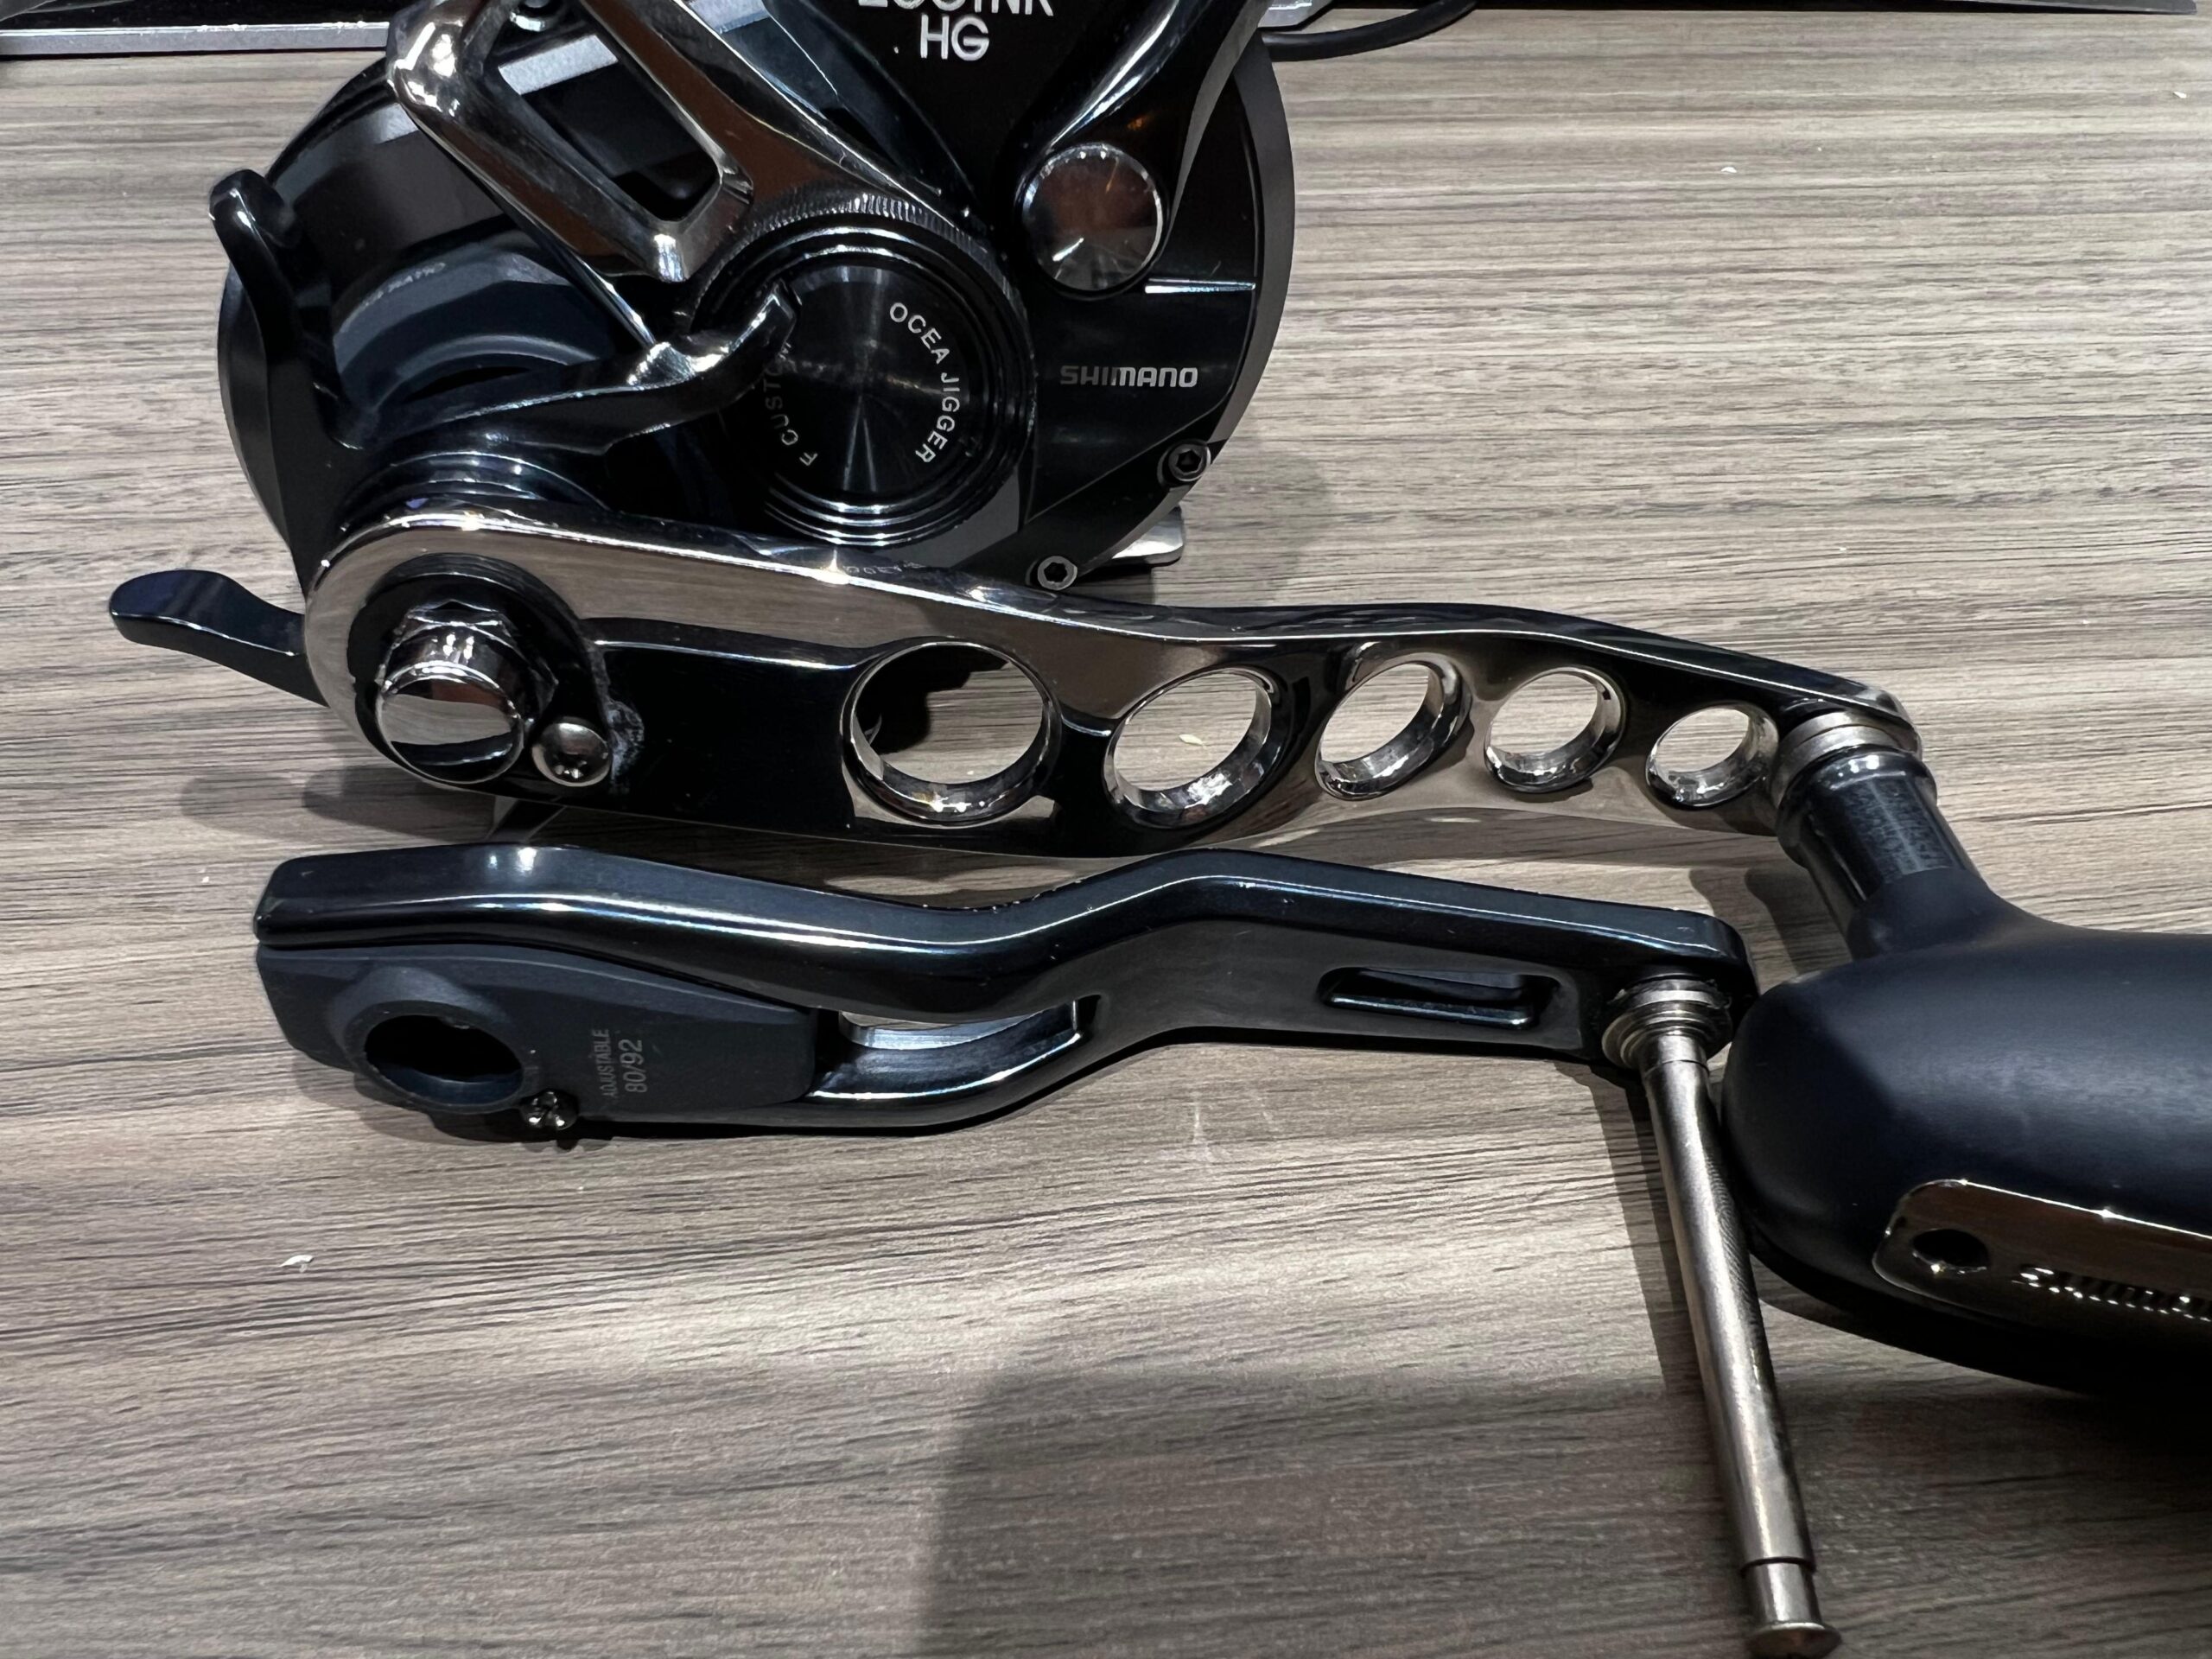
Stock OJ handle arm vs custom 115mm arm
Most jigging reels have 85-95mm handles, ideally suited for typical jigging activities. I found that a 110-120mm handle length for deep jigging can make a significant difference. Combining a low gear ratio and a longer handle arm significantly increases torque, making cranking up a jig or winching in a fish much less tedious.
Line Capacity
I prefer to have at least 600m and, ideally, 750m of line on my reel. There are several reasons for aiming for more than twice the length of line needed for a maximum depth of 300m:
One important reason for having more than twice the necessary line length is to ensure continuity in fishing if I encounter line breakage. For example, if 250m of line is out and it snags on the bottom, necessitating a break-off and line breaks midway, that is losing 125m of line. If I only had 500m on my reel, this would mean losing 25% capacity, leaving with just 375m, rendering the reel ineffective, and this is the last thing we need, especially during a hot drift.
Another key reason is to preserve optimal spool capacity. which helps manage drag effectively. This approach leverages the principle that the force required to turn the spool is inversely proportional to its radius. In other words, the drag you set at full spool increases as the line is paid out. For instance, if the drag is set at 10lb at full spool (100%), it increases to 20lb when 50% and 30lb at one-third capacity. Conversely, 250m out of a 500m line capacity occupies 60% of the spool, while 250 meters out of a 750-meter line capacity occupies only 20%, thereby minimizing drag fluctuation. This becomes particularly important with light lines that offer minimal buffer before reaching their maximum breaking strain. Experienced anglers adjust their drag intuitively, but many anglers may not react in time or know when to adjust as line peels off.
Another vital reason for needing extra line capacity is managing challenging conditions such as fast currents or long drifts. In these scenarios, we must drop the jig repeatedly as the boat drifts to stay on the bottom, which means more and more lines will be released. With a larger line capacity, I can remain in the drift longer without the frequent need to reset and re-drop because my spool is running thin.
The final reason is more psychological. Having more lines on my reel provides a sense of security when engaged in a fish fight. For instance, imagine hooking a substantial fish that starts taking line at the end of a long drift with only half a spool left. This situation can be nerve-wracking, and having ample line helps maintain composure and prevents rash decisions that could risk losing the catch.
Lines
Undoubtedly, using the thinnest line feasible is essential for swiftly cutting through water currents and minimizing the distance to your target. This reduction ensures optimal sensitivity that enables you to detect when your jig reaches the bottom. It can even help differentiate between hard and soft seabed in certain scenarios. This heightened sensitivity is crucial when using bottom assist hooks, as it requires swift reflexes to lift the jig off the bottom to prevent snagging.
When selecting lines, my primary consideration is the amount of drag I plan to use. I typically set my initial drag to 10 pounds, so when I hit bottom, I’m at about 20% of my spool capacity, which means my drag has increased to around 13 pounds, which is my target drag setting. The drag gradually increases as I continue drifting and release more lines to stay close to the bottom. Before filling my spool, I mark the 50% point. When I reach this mark, my drag increases to 20 pounds, and I usually reset at this point. Understanding drag settings at different spool capacities helps decide which line to use.
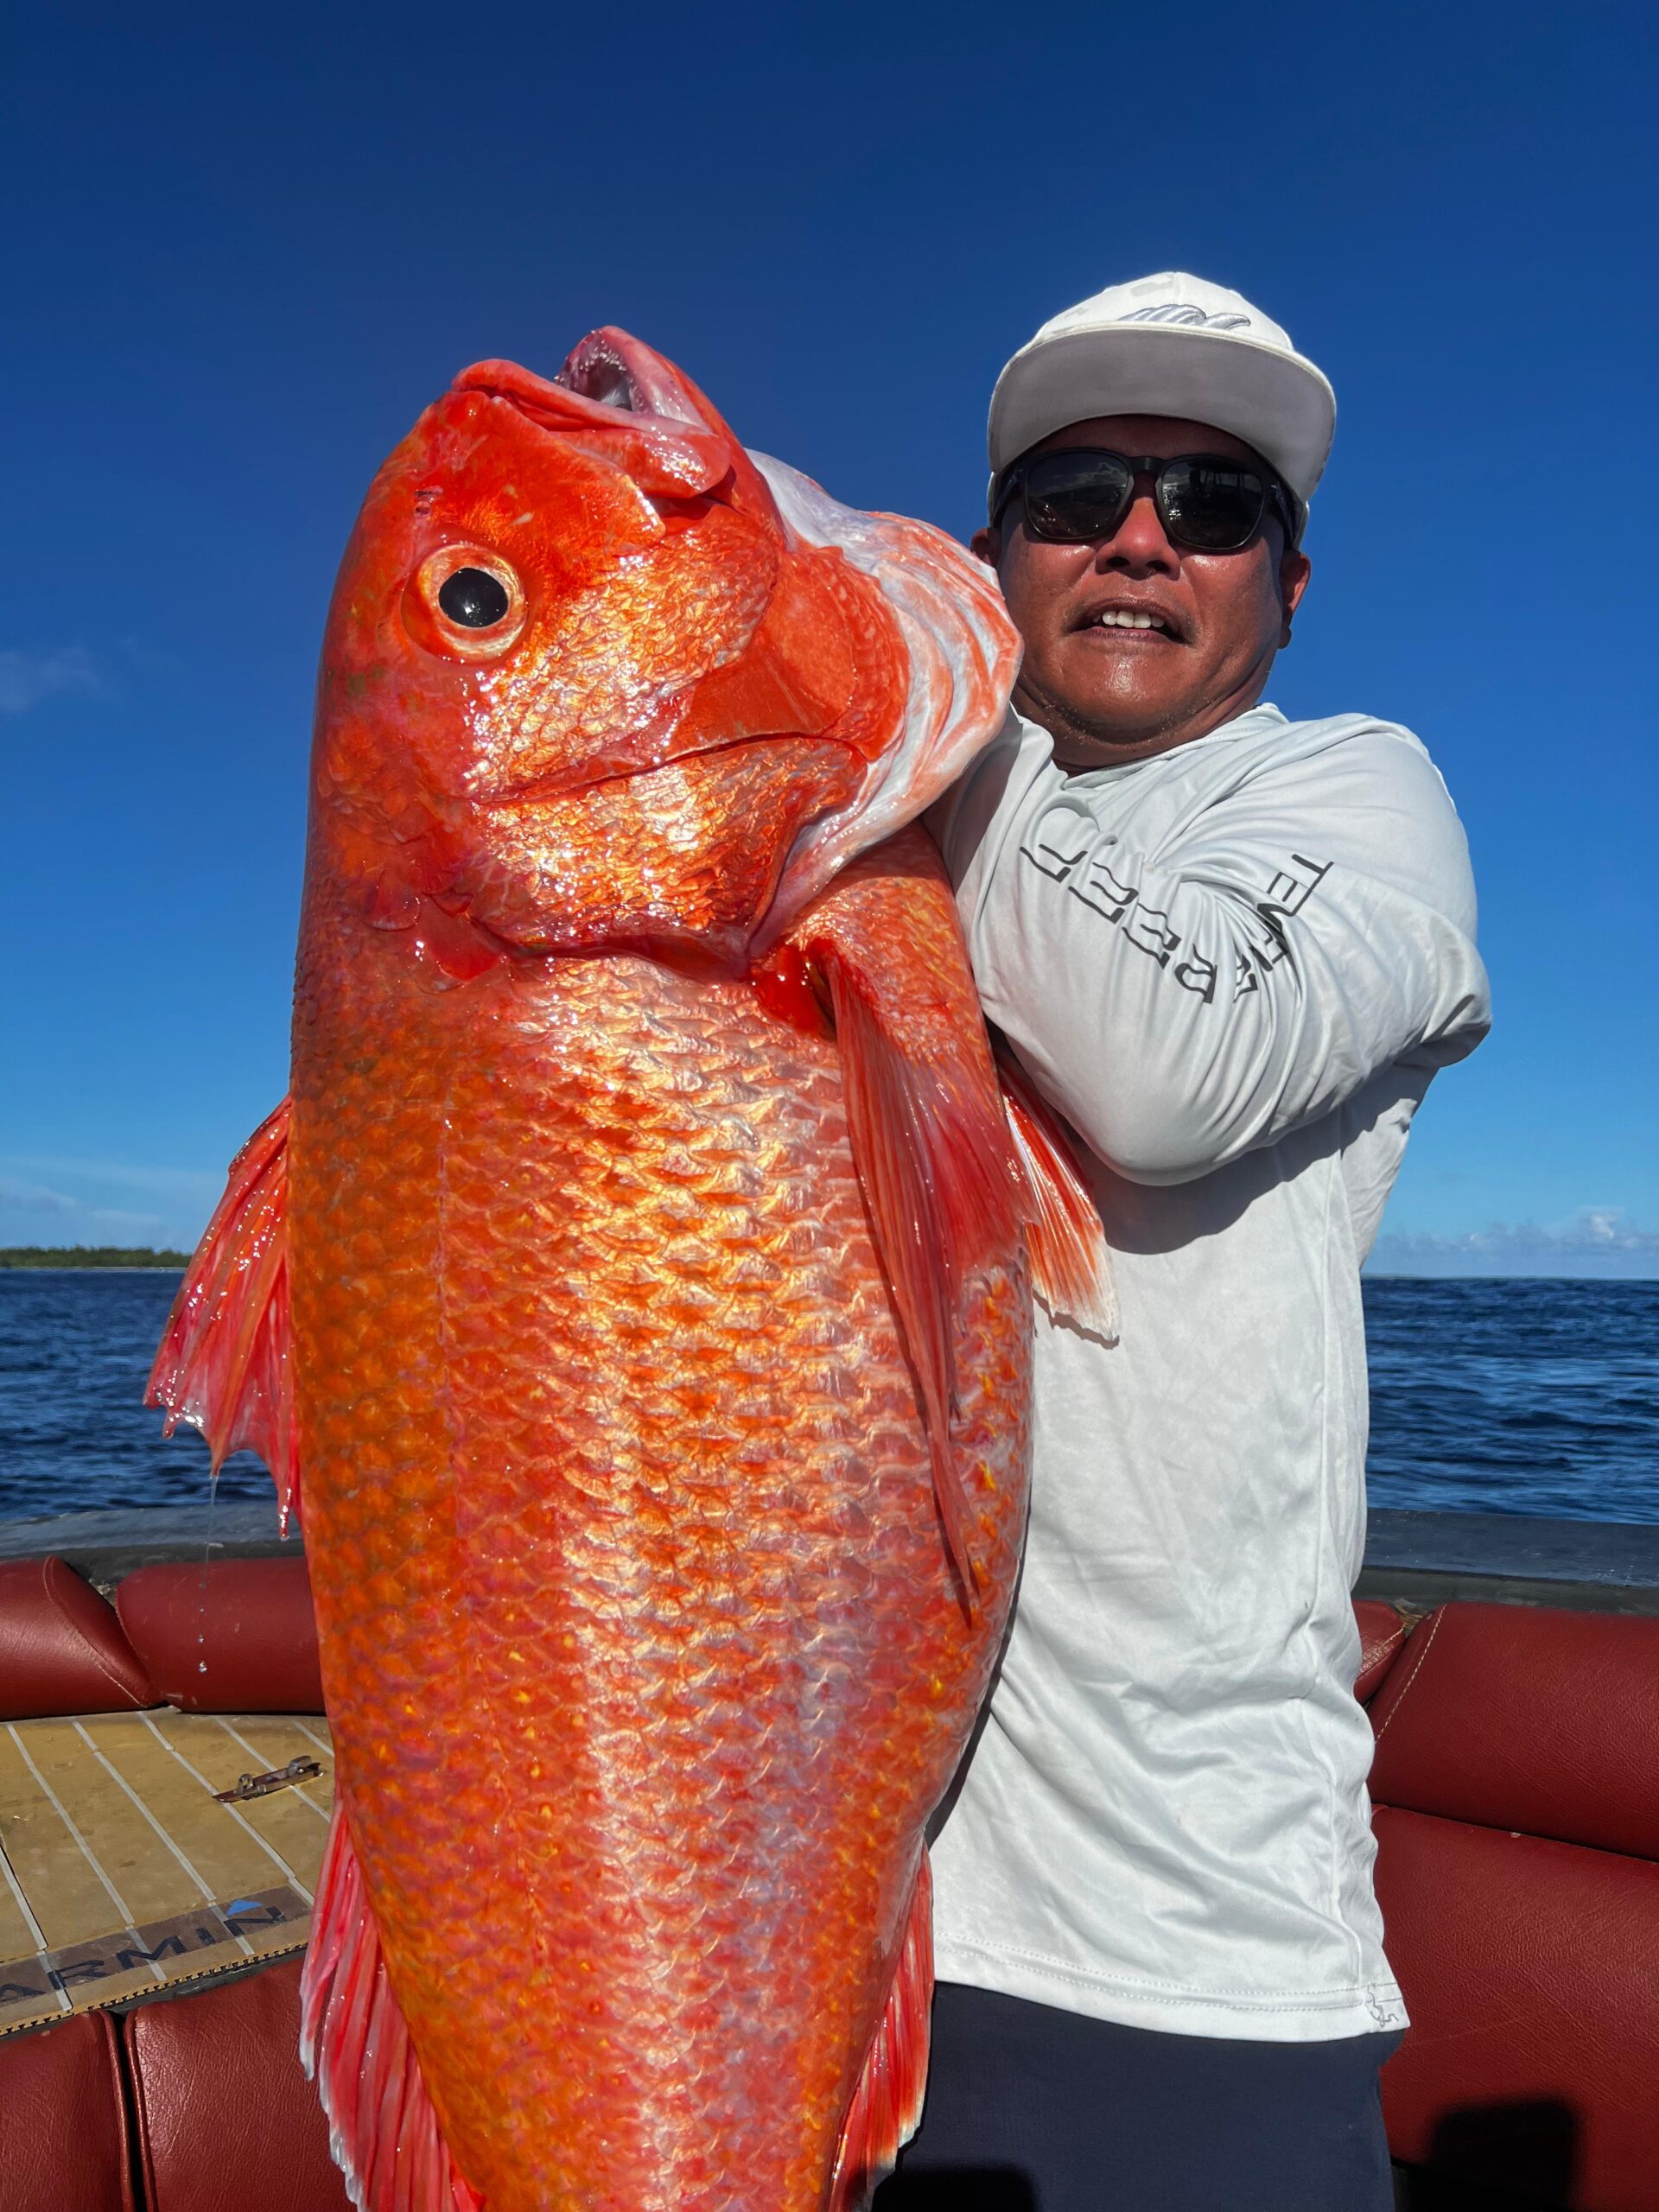
For this setup, I choose PE1.7 from Sunline ULT PE 4X (1200m spool) with a breaking strain of 30 pounds. This line has performed exceptionally well, helping me land my personal best Ruby Snapper and handle an 8-foot shark. The durability and strength of these lines are impressive. Additionally, I prefer 4x over 8x braid for thin lines because they tend to be more resistant to fraying.

Color: 20m x 5 xolors / 1200m single item


Choosing A Rod
As a rod designer, I am deeply invested and savvy and have the luxury to build a rod exactly how I want it. The optimal rod for working heavy jigs in deep water has a stiff backbone that stops bending beyond the stripper guide. After using typical SPJ rods that were thin and parabolic, I found that working heavy jigs with them was challenging and inefficient, primarily due to excessive bending. Below, I have created three diagrams (exaggerated and not to scale) to illustrate this point. The first shows a solid pole that is the most efficient but unsuitable for fishing, the middle depicts a typical SPJ rod, and the third is a 2/3 joint-type SPJ rod that stiffens at the stripper guide. Each rod measures 2 meters (6’8″) in length and was angled to 80°.
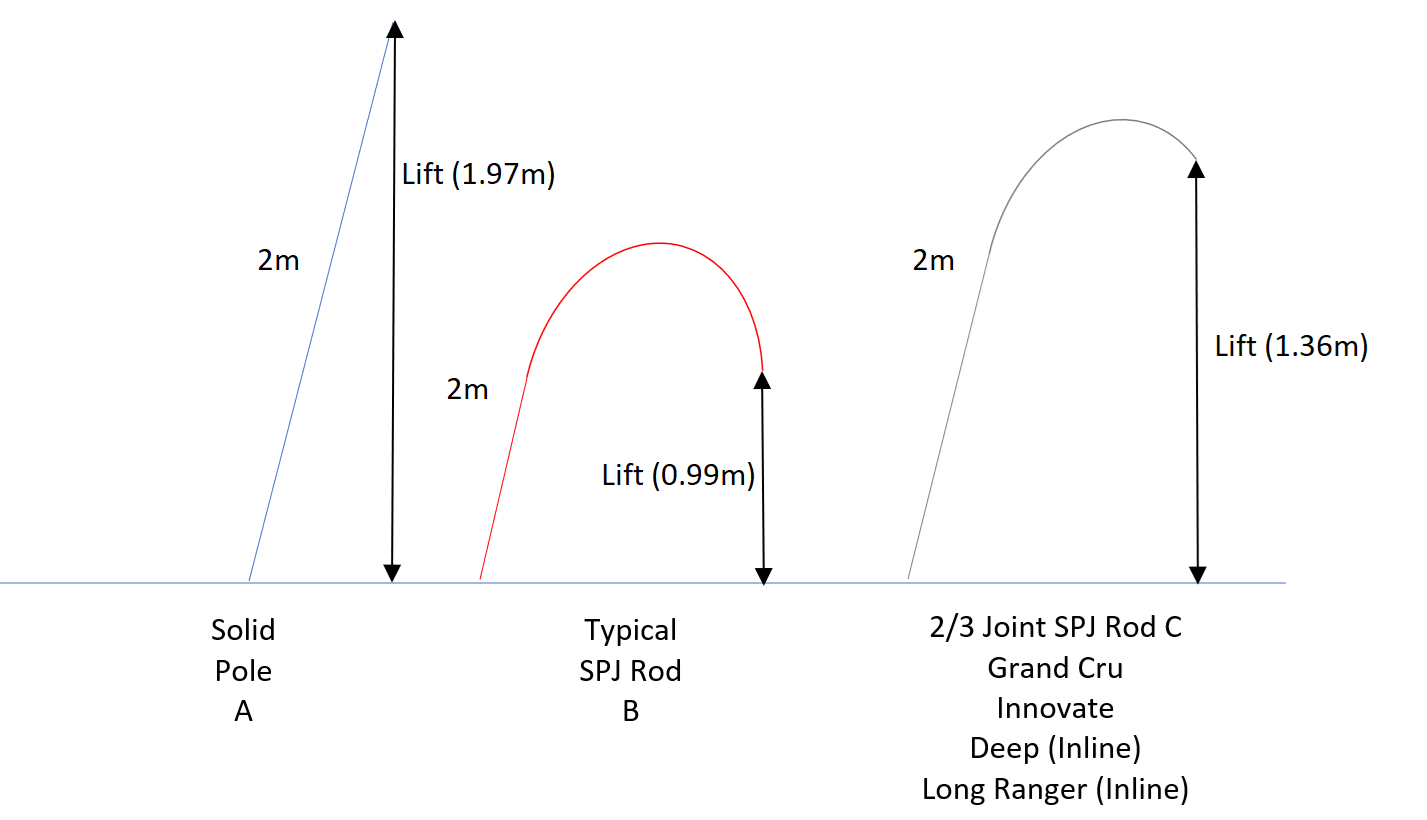
In these illustrations, “lift” refers to the vertical distance a jig moves. Due to the excessive flex of rod B, the jig was lifted only 0.99 meters (39 inches). Considering the effects of boat drift and ocean currents, which typically cause the line to deviate from a straight path and create line bow, the actual lift achieved by rod B was roughly halved to approximately 0.49 meters or 19 inches. In contrast, the jig was lifted 27 inches with rod C, a 70% increase over rod B. This greater lift is crucial as it allows the jig to reach higher, resulting in a longer fall that is more likely to attract target fish.

However, this does not imply that typical SPJ rods are unsuitable. I find great joy in using this type of rod, as they are more forgiving, and the fluid motion of the rod is quite captivating. Therefore, in conditions with minimal boat drift and current, my preferred choice is one of these rods, especially from the Levitate series, allowing me to appreciate the pleasure of SPJ fully.
Jigs
On a flat, calm day with minimal current, almost any reasonably weighted jig can effectively reach the targeted bottom. However, the challenge arises when conditions are less than ideal. This is where selecting the correct jig becomes crucial.
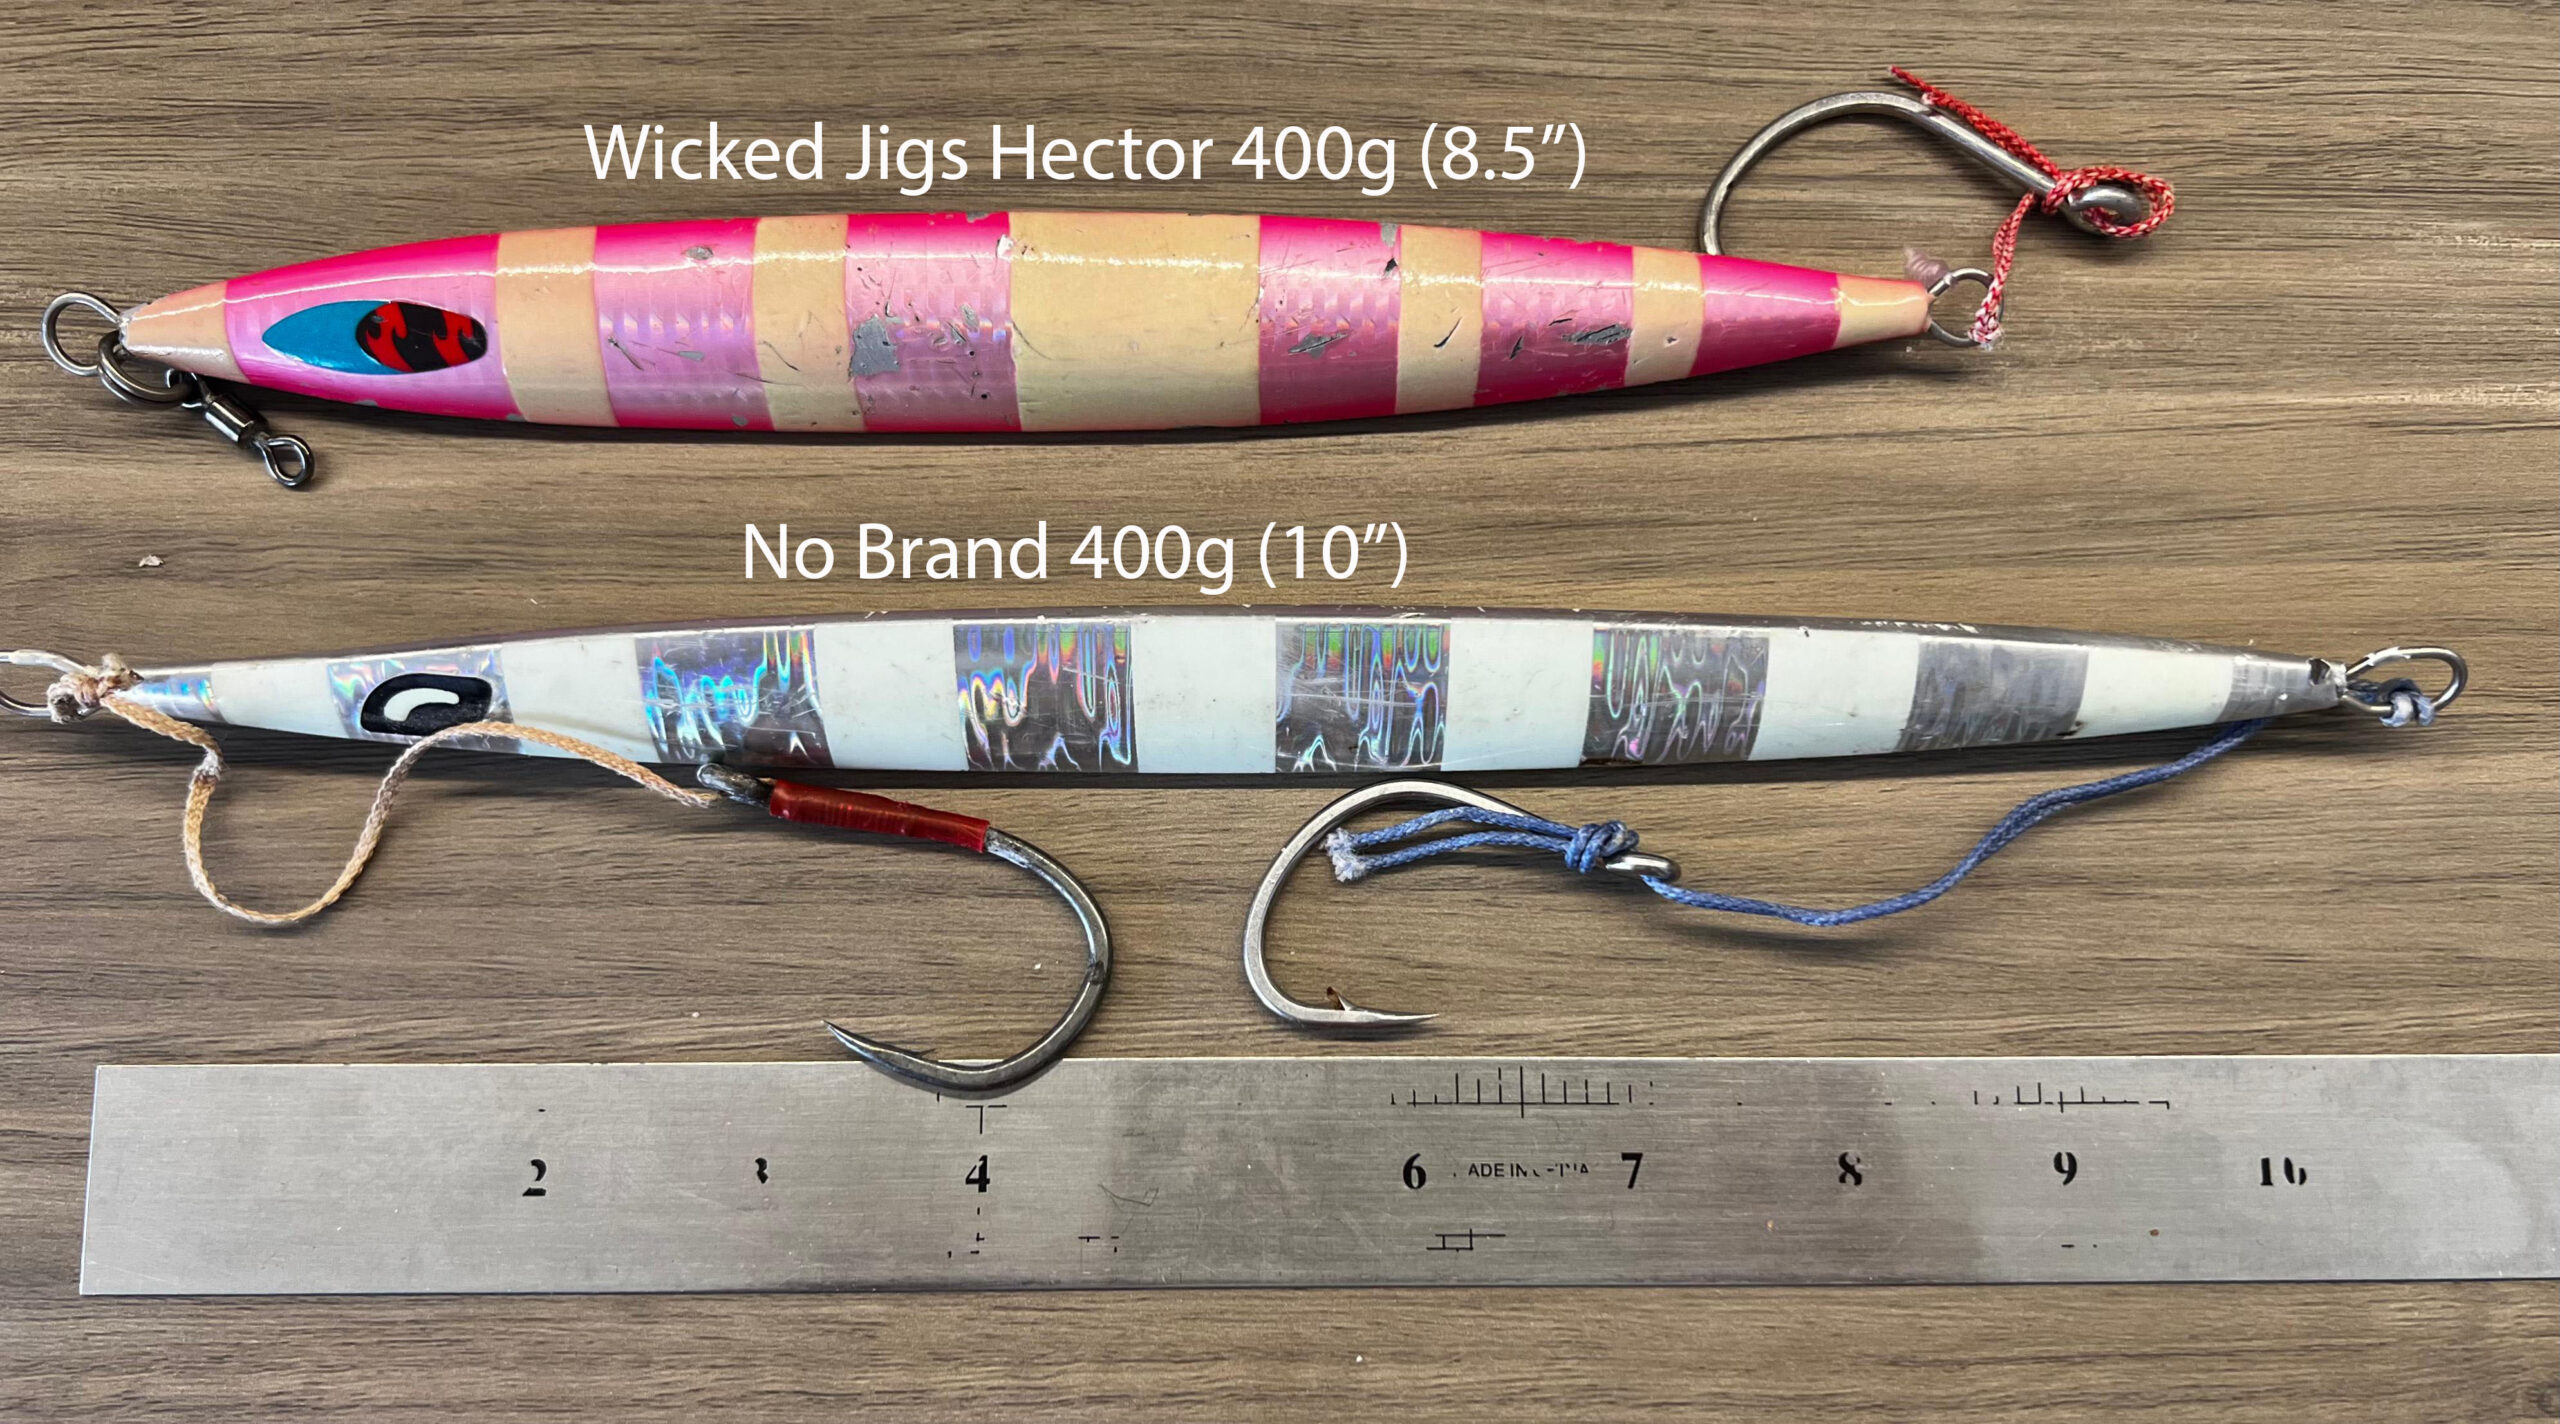
The primary factor to consider when choosing a jig is the drift caused by wind and currents. This element significantly impacts your chances of catching fish. For this explanation, I’ll use 400g jigs, my go-to starting point, before adjusting based on conditions.
I prefer jigs that are 8″ to 10″ long. Longer jigs tend to slide during descent. Ideally, I want a jig that drops straight down without fluttering or sliding.
I always start with a longer profile jig, like the bottom one in the illustration below. If it scopes out too much, it indicates that the drift is affecting the jig’s descent. In such cases, I switch to a shorter jig of the same weight, similar to the top jig in the illustration. If the shorter jig still doesn’t work, I increase the weight to 500g to counteract the drift more effectively.
Adjusting the jig profile and weight based on drift conditions optimizes fishing. This systematic approach ensures that your jig descends correctly and stays in the strike zone longer, ultimately increasing your chances of a successful catch.
Assist Hooks
Deep jigging primarily targets bottom-dwelling fish such as Groupers, Queen Snappers, and Ruby Snappers. These aggressive predators possess relatively large mouths and employ a unique feeding technique. When they go after prey, they open their mouths wide, creating a vacuum that sucks in their target.
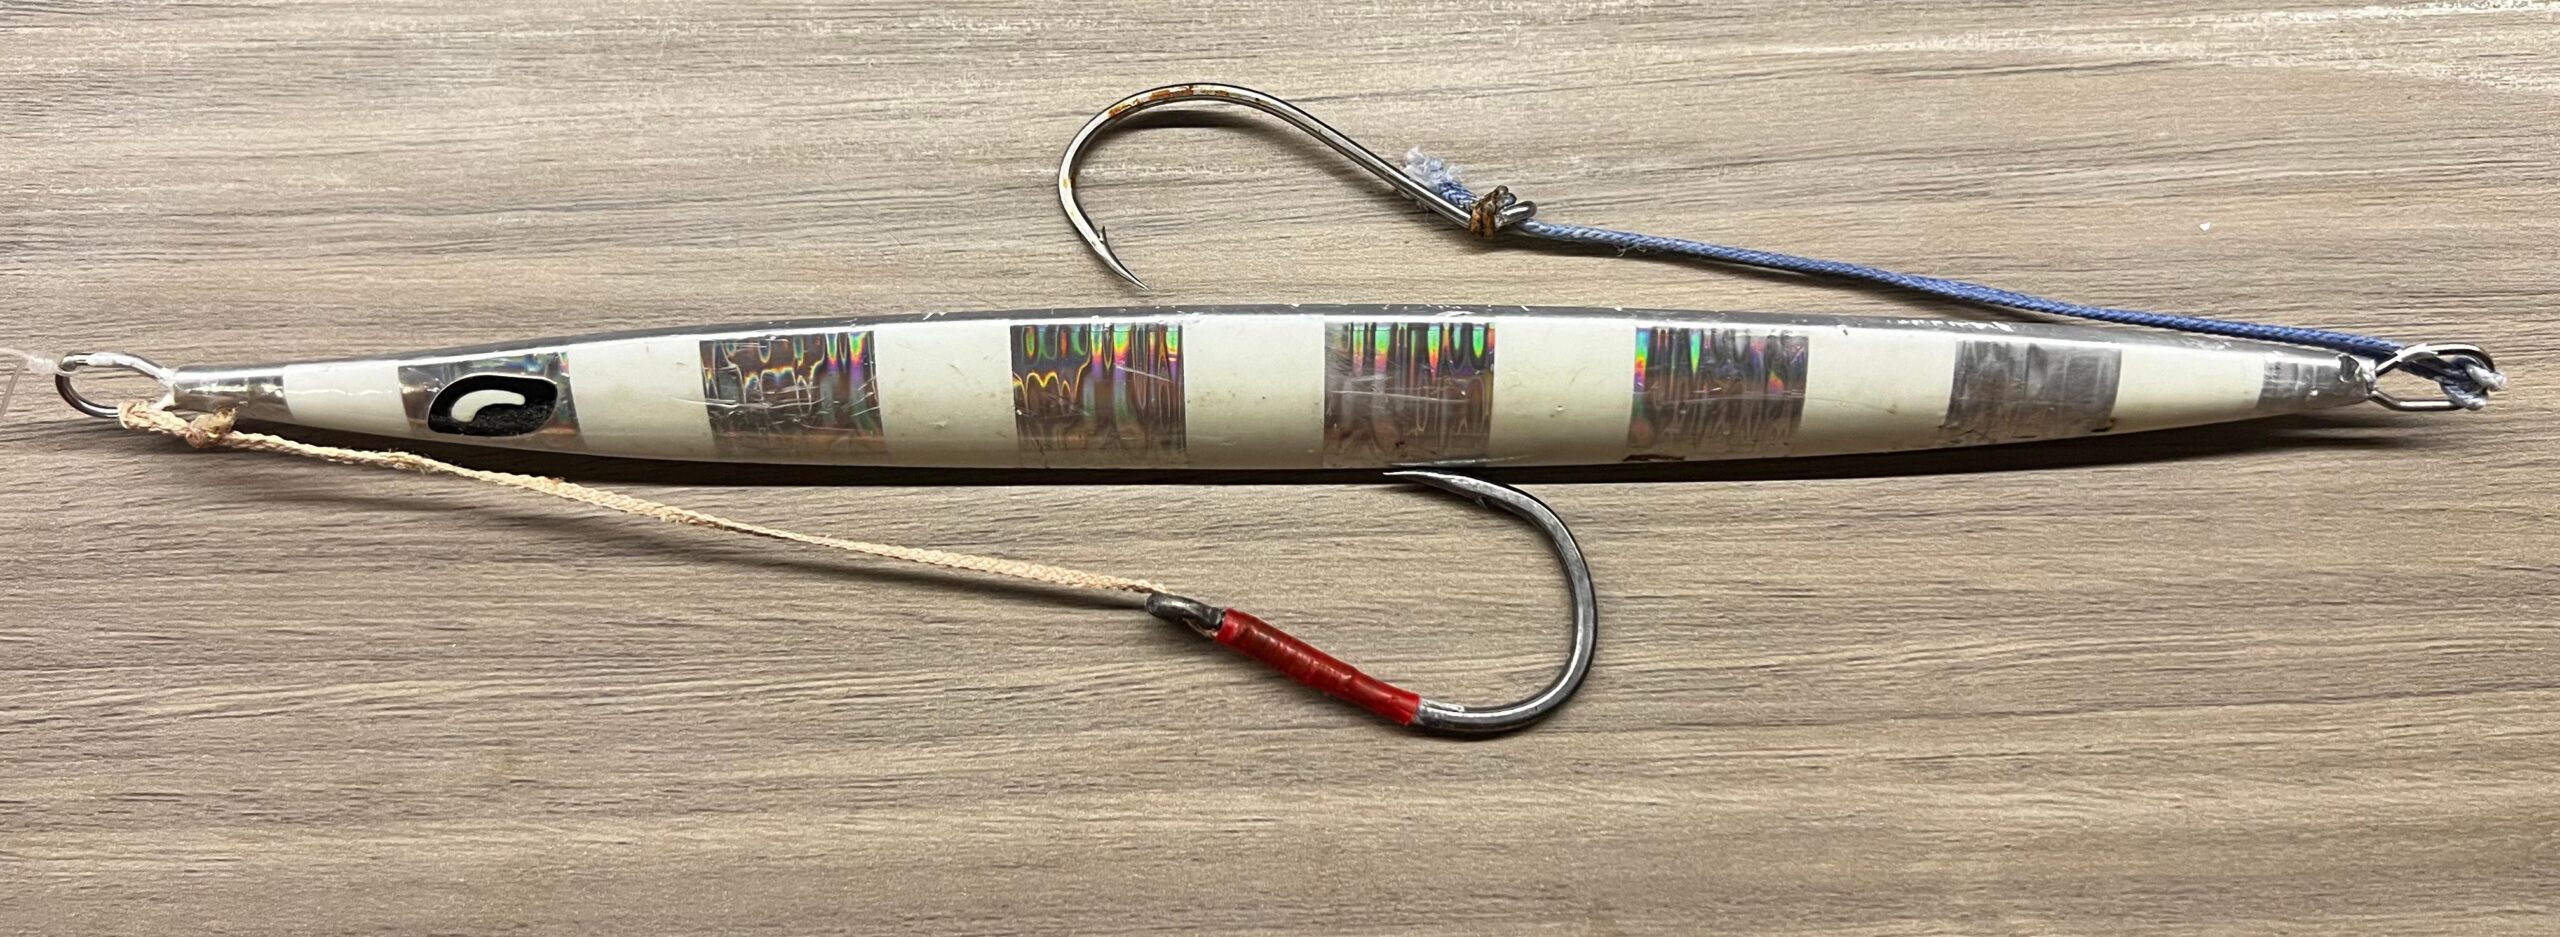
Based on this principle, I opt for long single assist hooks at both ends of the jig. These hooks are slightly longer than half the length of the jig, as illustrated below. This design ensures that the long assist hook is the first thing that gets sucked into the fish’s mouth, increasing the chances of a successful hook-up.
Additionally, a long bottom assist keeps the hook further away from the seafloor when the jig hits bottom, allowing ample reaction time to lift the rod, thus reducing the risk of snagging. While it might seem that having long assists at both ends could lead to tangling, I have not encountered this issue thus far.
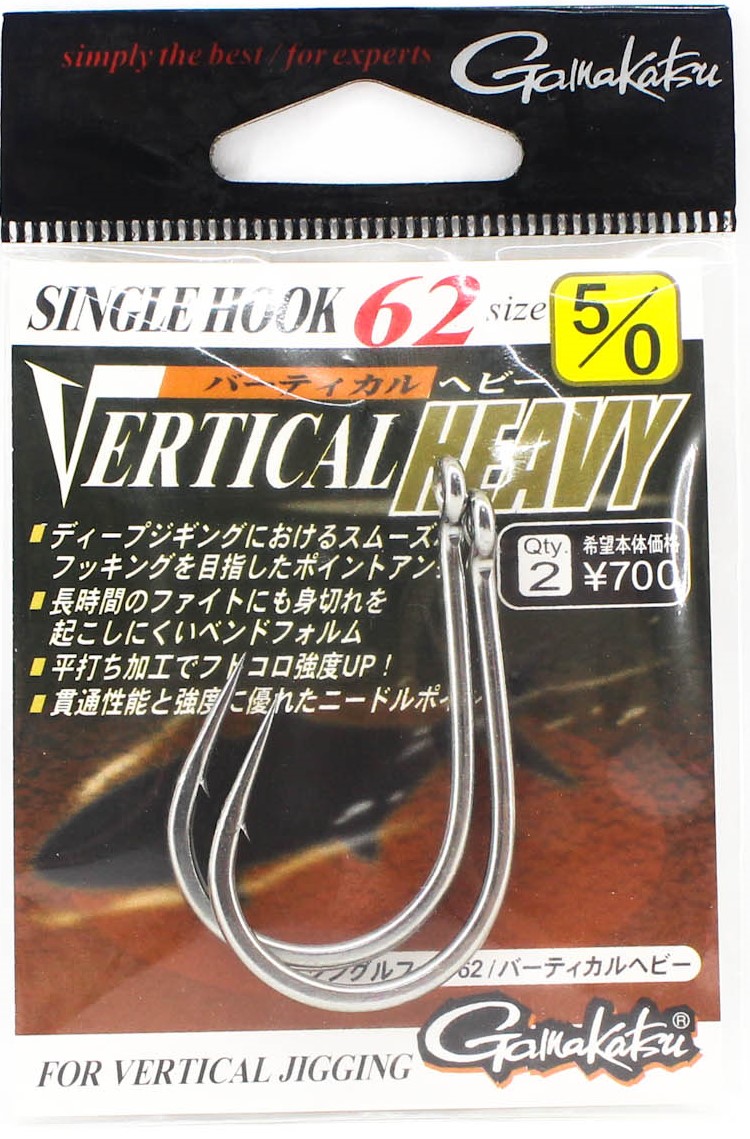
Everyone has their preferred hook style, and most hooks will get the job done, so I won’t go into too much detail on this topic. I prefer hooks with a wide gap, forged, and have a needlepoint. The Gamakatsu Single Hook 62 is worth considering as they stay sharp and are very strong; the only downside is they are pretty pricey.
Making assist hooks from scratch is necessary because premade long assist hooks are not available off the shelf.
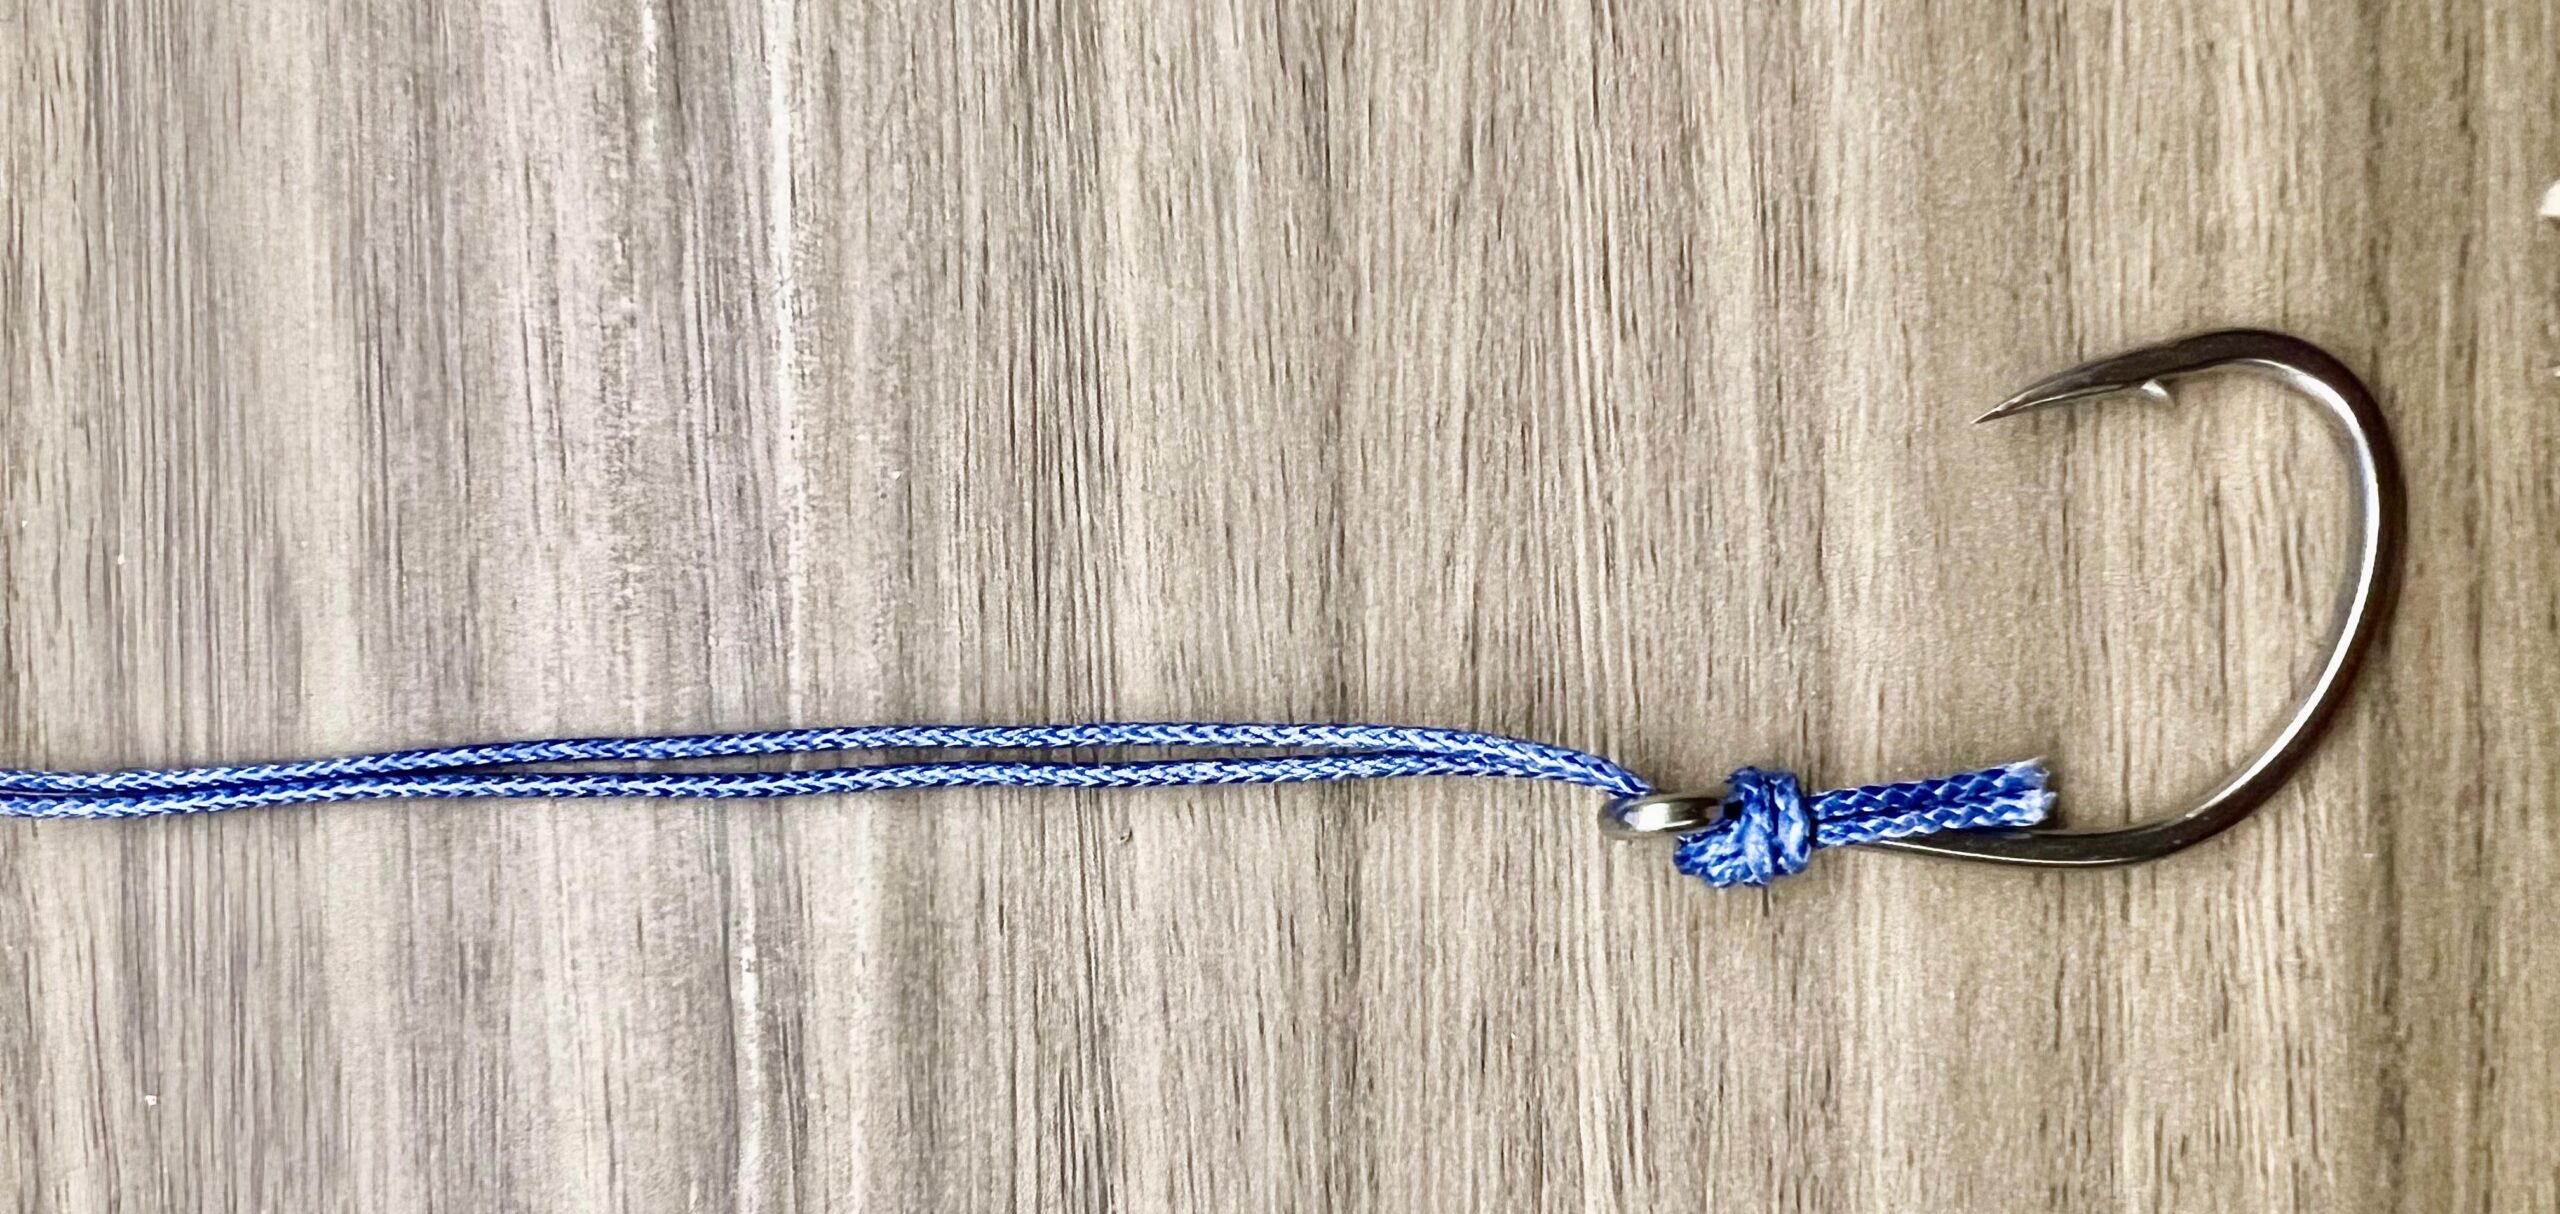
Keeping things simple is key, and I find it just too troublesome to serve an assist hook so that they look pretty. Using a 150lb assist cord and tying an overhand knot onto the hook is easy and effective. This approach is practical because it allows for quick adjustments to the length of the assist cord to match the jig in use. If switching to a shorter jig, the overhand knot can be easily undone to shorten the cord accordingly.
Another crucial tip to keep in mind is to avoid using bottom assist hooks when drifting over undulating terrain (as shown in the image on the left) and when drifting from deep to shallow. It’s almost certain that you’ll snag the bottom (unless it’s a mud bottom), which is something I always strive to avoid. Getting snagged can result in losing an expensive jig, wasting precious time to re-rig and re-drop, or, in the worst-case scenario, having your main line break in the middle. I’ve experienced this firsthand and hope it doesn’t happen to anyone else.


Tips and Techniques
This section will share tips and techniques to optimize your deep jigging fishing experience. Understanding several vital aspects can help you catch more fish and avoid losing equipment:
Information – One crucial aspect is gathering information. Before dropping my jig, I will try to have the information below. Based on what was shared earlier, you’ll find having this information beneficial:
– Depth of jigging
– Length of the drift
– Speed of the current
– Type of bottom expected (undulating or otherwise)
– Drift direction (deep to shallow or shallow to deep)
Dropping the Jig – In an ideal situation, a jig should descend straight down, pulling line out of your reel as it falls. However, in most situations, drift and currents complicate this process. Instead of the jig pulling line out, the current often causes your line to spool out faster than the jig descends, creating a bow in the line. As mentioned earlier, a
thinner line can mitigate this effect, but a significant bow is inevitable over long stretches. However, we can minimize it with controlled descent.
It’s beneficial to develop the habit of controlling your jig’s descent. This practice prevents the jig from fluttering or sliding, helps detect strikes during the drop, and lets you know precisely when the jig hits the bottom to quickly lift the jig away from the seafloor to avoid snagging; this is especially crucial if using a bottom assist hook. Feathering the spool during the drop is a good practice. Stop the jig every 30-40 meters to let the line straighten; you’ll know it’s straight when you feel the jig’s weight. Repeat this process until the jig hits the bottom. Additionally, pointing the rod downward during the drop can help lift the jig off the bottom more effectively when it hits the seafloor, compared to keeping the rod in a horizontal position.
Jigging the zone – Groupers, Queen Snappers, and Ruby Snappers are bottom dwellers that seldom venture outside their zone. Therefore, it is logical to focus on working the bottom layer, pitching the rod, and allowing the jig to entice a bite. While this can become monotonous when fish aren’t biting, grinding it out and persistence, more often than not, is part and parcel of deep jigging.
Detecting bites and hookset – Even with diligent efforts to keep the line tight, it’s inevitable that a significant bow will develop, especially towards the end of the drift when the line is scoped out at an angle. In such scenarios, bites can become subtle and challenging to detect, mainly if the fish are insignificant. Hence, maintaining focus is essential. By staying attentive, you can develop a heightened sense of detecting when something unusual occurs, prompting you to react with a hook set to avoid missing a bite. Sensitivity is crucial in deep jigging, as it helps recognize these subtle bite indications.
Battling Fish – Many anglers stick the butt end of the rod on their belly when battling a fish, leveraging the pump and wind technique. This method provides exceptional leverage but can lead to losing fish due to hook dislodgement. I was a fan of this approach until I lost a few fish due to hook dislodging, which made me reconsider this method.
When pulling in a fish from the deep, the line connected to the fish is not always perfectly tight due to line bow. As you pick up the line after each pump, slack can develop. If the hook is not properly embedded in the fish’s mouth, it can become dislodged. Remember, the throat of a fishing hook is less than an inch long; all it takes is a little slack to lose a fish. Additionally, the repeated pressure from pumping can create a hole in the fish’s mouth, increasing the risk of the hook dislodging with even the slightest slack.
A more effective way to battle fish is to winch them using the reel consistently. This method applies constant pressure on the fish, minimizing the risk of slack and reducing the likelihood of the hook dislodging.
Benefits Inline Jigging Rods – Since the introduction of inline jigging rods, where the line runs inside the blank instead of through guides, they have become my go-to choice. These rods’ increased sensitivity is remarkable, as the line remains in constant contact with the blank instead of running through guides, transmitting even the subtlest nuances directly to the angler. This level of sensitivity is unparalleled in rods with traditional guides.
The absence of guides eliminates the risk of line entanglement, providing a smoother experience as the line glides effortlessly along the smooth interior surface of the blank. This design greatly enhances the
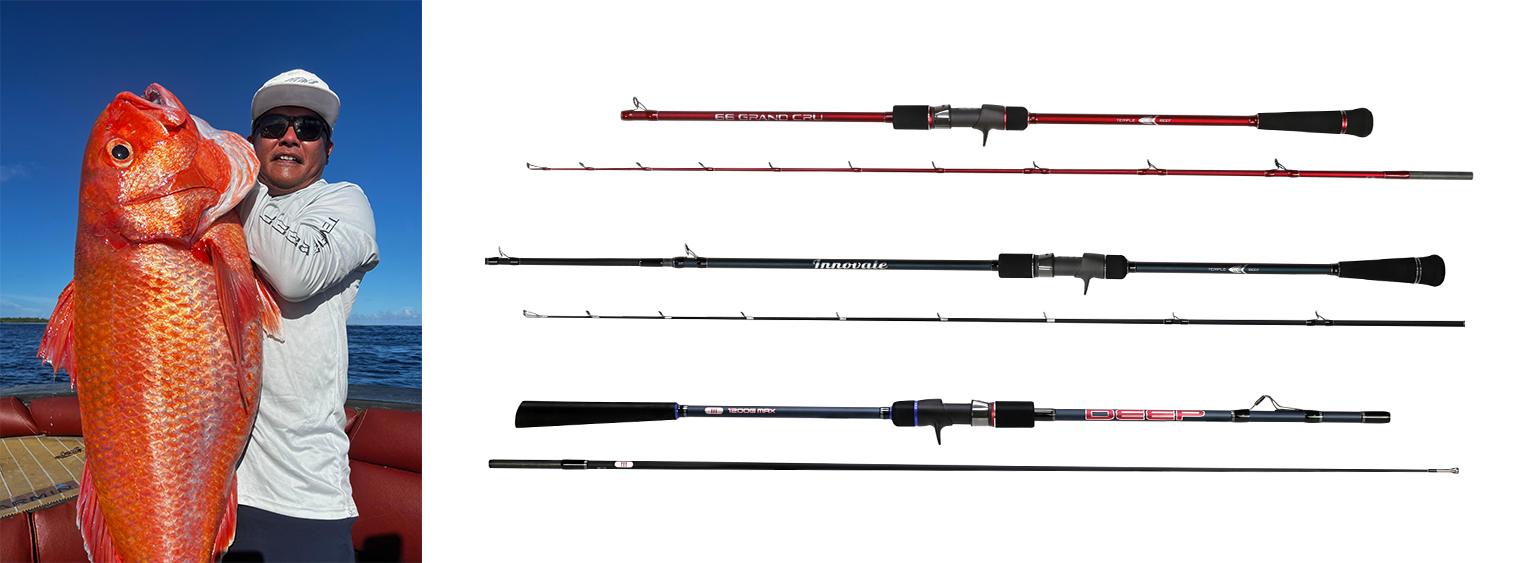
joy of using these rods. A prime example is Temple Reef’s Deep series, which excels in deep water slow-pitch jigging. Its 2/3 joint design ensures a solid backbone, making it forgiving and efficient for pitching heavy jigs.
66 Grand Cru

Innovate
Deep
Electric Reel for Deep Jigging
Many anglers view electric reels with skepticism, considering them unsporting. However, they have their place, particularly in deep jigging. Without a battery, an electric reel functions just like a manual one. I use the electric power to retrieve jigs from the deep, making the process quick and effortless. When fighting fish, I crank manually but can switch to electric power if tired. Electric reels are invaluable when the bite window is short, or fish are dispersed over a large area. They allow quick resets at shorter intervals and reduce fatigue over prolonged sessions. One caution: returning to a manual reel can be challenging once you experience an electric reel’s convenience!
I hope you found this article both informative and enjoyable. There are never-ending methods, styles, and techniques in fishing, each with its own merits. I’ve shared what has worked best for me here, so I want to share my experiences and insights with everyone, hoping they might also benefit you.
Thank you for reading, and tight lines!
Randy C.
@Templereef
7/23/2025